Custom Fonts
Precrafted Support
All of our themes allow you to embed fonts from web services like TypeKit, Fonts.com and Google Fonts.
Please note, custom font setups can be complicated – this feature is intended for advanced users who are comfortable with CSS. It’s more than likely that you’ll need to tweak some of the font weights/sizes once you install your new font/s, by adding code in the Custom CSS box (under the Advanced Tab on your Customize page).
We recommend using Chrome DevTools to find the classes you might need to change. Also, if you’re using TypeKit, they have some great documentation that should help you.
So how does it work? On your Customize page, you’ll see the following Font input options:
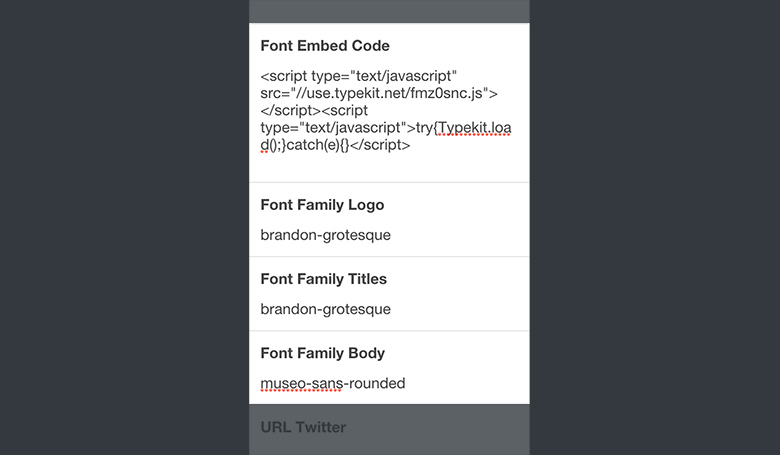
They’re pretty self-explanatory – paste in the embed code provided by your font service (remember to make sure you’ve set it up to allow your blog domain and fonts), then you can add the font name for the Body font, Logo font, and Titles fonts (includes Quote and Link post types).
This should cover the needs of most users – if you want to customize the fonts further you’ll need to use the Custom CSS input to target individual classes/elements.
A few tips and things to note:
- When you set up your fonts on your font service, you usually select specific weights to include – you’ll need to make sure you either include the same weights as the theme uses, or change the weights once your font is installed using Custom CSS.
- Remember that if you’re using TypeKit or similar – you won’t see the fonts on the Customize preview panel, as you’ve likely only enabled your blog domain (the Customize preview panel is on tumblr.com) so you need to check the fonts on your actual blog.
- The Font Family fields only become active once you have added an embed code, at which point the themes original font embed is disabled. So you’ll need to fill in a font for all of the boxes.